

Sprinkler Repair and Maintenance in South Florida
On January 4th, 2021
The sub-tropical life in South Florida leaves us enjoying the outdoors all year long. Keep your sprinklers in top shape and your lawn will stay green all year with these easy sprinkler repair and maintenance tasks.
Quality sprinkler systems are easy, water-efficient means to keep your lawn verdant and healthy. In addition to their programmable and scheduled irrigation, strategic sprinkler head placement ensures that water is evenly distributed across the yard. The system can be altered to provide optimal irrigation in response to changing seasons and needs. In order to provide this stellar care for your lawn, they require their own maintenance and care.
To assist you in keeping your irrigation system operating at its peak performance, the following sprinkler repair and maintenance tips ensure a smoother-running system that endures for years to come. While some of the tasks may be best left to a certified irrigation contractor, others require a quick consult with your owner’s manual.
- Clean your sprinkler heads.
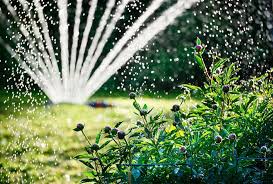
Its normal for sprinkler heads to become clogged with dirt and other ground residue. Clogged sprinkler heads will affect the distribution of water across the lawn, potentially leading to brown, dry patches. By checking to make sure that sprinkler heads are clear and clean, you will keep the whole system running evenly and efficiently.
One suggestion is to set yourself an annual reminder to clean sprinkler heads to ensure they continue to flow water properly and that water pressure remains consistent. The process will entail turning off the irrigation system and removing and soaking the nozzle, so consult with your irrigation system installer on how best to clean your sprinkler heads. Additionally, always keep an eye out for any potential clogs while in use such as dry spots and no water flow, and be sure to handle the issue right away. If you prefer, call Beacon Irrigation for regular system maintenance and service.
Sprinkler heads are often damaged during regular lawn maintenance and mowing. If you discover a damaged part leftover from the last time you mowed the lawn, follow this step-by-step on how to replace a sprinkler head.
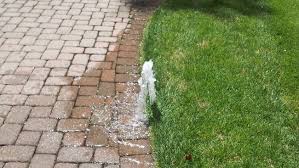
- DON’T ignore leaky sprinklers.
A small leak can create much larger problems. Not only could the lawn and garden become flooded at the leak while shorting irrigation elsewhere in the yard, but your water bill may also increase because of unneeded use and it is wasteful for the environment.
Notice the general water flow of the entire sprinkler system. Make sure water pressure is consistent, and that water is evenly distributed across the lawn. Promptly take action as soon as you notice the leak in the sprinkler itself or see puddles in the surrounding lawn to prevent the problem from compounding. You can either refer to a sprinkler installation guide for sprinkler repair steps, or contact an irrigation specialist if you don’t have the time or desire to do it yourself.
- Make sure to check valves.
Faulty valves are the most common culprit causing sprinkler leaks. Valves are plastic parts that help direct water from its source, through the manifold or valve assembly, and out to the yard.
Again, irregular water pressure or patchy dry or brown areas in the yard may indicate a valve problem. . Check valves in both the central valve assembly and individual sprinkler heads, as well as their corresponding zones of the grass. The central assembly or manifold can be located above ground or underground and is usually found close to the house. Look for cracks, rips, or other signs of wear in each of the valves.
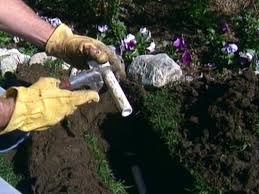
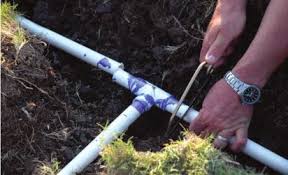
- Repair faulty pipes.
Pipes are important for effective and efficient water flow in your sprinkler system. Pipes can become damaged by normal wear and tear as well as other unfortunate incidents, such as a burst from water pressure or a confrontation with a garden spade or shovel. As with a leak, you’ll want to keep an eye on water flow throughout the lawn and watch for any inconsistencies in different zones. If you’ve determined that the valves and other parts are fine, the pipes may be damaged. Refer to the installation guide and any other manufacturer’s resources online for pipe repair guidance as soon as possible.
- Test the voltage.
Use a multimeter to take a voltage reading to test the electrical function of your irrigation system. Sprinkler systems have many electrical parts, including a transformer, controller, solenoid, and wiring. Standard sprinkler systems typically operate on 24 volts, or “24 VAC” on a multimeter. The evaluative multimeter tests are not difficult to perform, but electric repair work is best left to an electrician, or in this specific case, to a certified irrigation specialist.
- DON’T neglect transformers.
A fully operational transformer helps to power the sprinkler timer. Without it, the pipes, valves, sprinkler heads, and water can’t do anything for the lawn. A quality multimeter can again be used to test this electrical part to ensure if the transformer is operational or if it needs to be replaced. Test this electrical part with a quality multimeter to ensure it’s operational. This reading determines if the transformer is in good shape or needs to be replaced. Additionally, look for any other signs of wear and tear on the transformer, such as fraying. Pay attention to the system as a whole. If it is not operating according to schedule, the controller may not be receiving adequate power from the transformer to do its job of keeping the system running on time.

- Ensure connectors are waterproof.
Keep wire connections on each individual valve protected and dry by adding waterproof connectors. This will help your connectors to last longer and will maintain system communications for proper function. Combined with a sealant, waterproof wire connectors will keep the electric components of a sprinkler system protected from moisture.
- Repair damaged wires.
Damaged wires will prohibit the controller from communicating with the valves and instructing them open or close on schedule. Normal wear and tear will deteriorate wiring over time, or there might be other more immediate causes, like as meddling critters or natural elements/weather. A qualified irrigation specialist can handle repair if the damage is significant.
- DON’T ignore detached wires.
Detached wires can disrupt a sprinkler system by causing a failure in communication between the controller and the valve. Evaluate the wire to determine the cause for detachment, such as extreme weather or broken parts.
Detached wires should be reattached immediately. Check connectors, valves, and the controller for potential causes as to why the wire detached and take preemptive steps to prevent wires from becoming detached again in the future. Consult the owner’s manual on how to reattach the original wire to ensure it is properly restored to its intended function. Check to make sure that the wire itself was not damaged in the process of detachment.
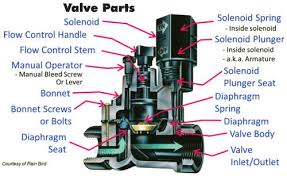
- Replace the sprinkler solenoid.
A solenoid is an electromagnet that communicates with the controller to open and close the sprinkler system valves. If not working properly, they may inadvertently lead to leaks or other malfunctions.
Replacing the solenoid involves taking the valve apart and reassembling in the proper order. Consult the manufacturer’s guide for solenoid repair and replacement steps, or hire a certified irrigation contractor for this sprinkler repair job.
Call Beacon Irrigation & Lighting, Inc. for qualified technician to assist in your sprinkler design, installation, service, and repair. 561-883-1201.